makeup by anne bismonte

makeup by anne bismonte

Friday, August 28, 2015

HOW TO: Highlight 101 (on FLEEEEEEEK!)


Hey there beauties! Okay, get yourselves together because we’re going to talk about those highlights on fleeeeeeeeeek. Highlighting is one of my favourite steps whenever I am doing my makeup because it can instantly lift your face and get rid of those tired looking eyes, it can make your face glow and dewy and youthful. Tell me, who doesn’t like glowing and youthful skin?

Highlighting is great when it is done correctly and when it is placed where it should be. It can be a little tricky but when you find the right shade that compliments your skin tone it could be your best friend for your everyday routine. I’m just going to talk more about highlighting and then I’m going to show you some of the products that I do recommend for highlighting purposes. 

During my makeup workshops, everyone gets crazy whenever we reached the highlighting topic. Because come on’ we all know that 2015 is the year of contour and highlight and there is a bunch of new highlighting and contouring products out in the market and it seems like everyone is raving about them. I am more into highlighting than contouring just because I like dewy skin, I love how it freshens the face and the look of the makeup. 

Let’s talk more about Highlighting.

WHAT IS HIGHLIGHTING? Highlighting brings facial features forward so they appear larger or fuller. Highlighting products are either light reflective powders or matte powders that are 2-3 shades lighter than your skin. The shades range from bright pearly whites to matte beige shades into champagnes, gold’s and rose gold shades for deeper skin tone. 


Two forms of highlighting: Creams/liquids/matte powders that is lighter than our skin tone and light reflective powders.

Parts where we usually highlight: T-zone  - Forehead, Chin, Cupids bow, Nose bridge and under eye area (For this areas, use a concealer or cream that is 2-3 shades lighter than you skin tone or your foundation then set it with a matte finish powder to set your highlighting creams or concealers. Make sure that the powder you use corresponds to the shade of your concealer to make the highlight visible.)

Highest points of your face - Chin, top of the cheeks, brow bone, tip of the nose, top of the brow arch  (Use a light reflective powder for this part to accentuate your face and give you a dewy finish and not looking too flat. Avoid applying this kind of highlighting powder to your forehead as it can make you look oily instead of dewy. ) 

So here are the products that I do recommend for highlighting:

Light Reflective Highlighters:  (powder or liquid)

BECCA SHIMMERING SKIN-PERFECTOR IN OPAL

LAURA MERCIER MATTE RADIANCE BAKED POWDER IN 01
MAC MSF IN SOFT & GENTLE  AND IN GLOBAL GLOW


HARD CANDY BAKED BRONZER IN TIKI
HOURGLASS AMBIENT LIGHTING POWDERS

Highlighting Concealers: (My top 5 picks)


MAYBELINE INSTANT AGE REWIND DARK CIRCLE ERASER IN LIGHT 120


MAC PRO-LONGWEAR CONCEALER IN NC2O

ALMAY WAKE UP CONCEALER IN 020 LIGHT/MEDIUM

MAYBELINE FIT ME CONCEALER IN 010 LIGHT AND 020 SAND

RIMMEL LONDON WAKE ME UP CONCEALER IN IVORY
As you noticed, I have more drugstore recommendations when it comes to highlighting concealers because I find that drugstore brands, well some of them, did a really great job when it comes to their concealers and foundations. Rarely do I find a very good light reflecting highlighters on a drugstores brand, some of them are flaky and frosty and you girls should avoid that because it can be just chunks of glitters on your face. What we wanted for a highlight is a subtle sheen that will make us dewy. 

I like to use my fingers or a damp beauty blender in blending my highlighting concealers and what I like to use for setting my highlighting concealer is the BEN-NYE BANANA POWDER mixed with BEN-NYE NEUTRAL SET to make the yellow tone of the banana powder not super intense. I also like using the RIMMEL STAY MATTE POWDER or the MAC MINERALIE SKIN-FINISH NATURAL IN THE SHADE LIGHT.

Tell me if you want me to do an in-depth review on each product of highlighters that I do own. Shades that are being mention above are my own shade, you may want to check or do a research first to find your shade before purchasing the product.  I heard that Anastasia Beverly hills and Gerard Cosmetics will come up with a highlighter this coming holiday season! Who’s excited????? Mama is excitedddd of course! *snap *snap

Thank you for reading my blog and tell me what is your favourite highlighter on the comment box below! Don’t forget to subscribe to my blog and follow me on instagram at @annebismonte_mua. SEE YOU ALL SOON!


BTW, Here are some example photos for Highlighting. These photos are from my HEADWAY VERA SALON Ad-shoot. See the caption for the credits.  


MODEL: MJ MARFORI of TV5 Entertainment news Showbiz Konek
PHOTO BY: STEPHEN CAPPUCINO of Zoomburst Studio
MAKEUP BY: ANNE BISMONTE
HAIR BY: HEADWAY VERA SALON

MODEL: DESIREE DEL VALLE | TV ACTRESS of ABS-CBN
PHOTO BY: STEPHEN CAPPUCINO of Zoomburst Studio
MAKEUP BY: ANNE BISMONTE
HAIR BY: HEADWAY VERA SALON

Much Love,
Anne

Friday, August 14, 2015

GRWM: My Go To Everyday Makeup (tutorial)


Hi there beauty! When you’re a mom like me, probably you don’t have so much time to prep yourself but you want to look pretty formal before you leave the house and run some errands. I’m going to share to you all my very quick and simple everyday makeup. Everything is natural and it seems you’re not wearing any makeup at all, but we all know, it takes makeup to look natural. Did I make any sense? 


Let’s begin. 


First, you want to start off clean and moisturized. I do have a combination skin but sometimes I do get dry during “ber” months here in Manila because of the weather change. Here I’m just using my KIEHL’S ULTRA FACIAL MOISTURIZER suitable for all skin types.  I use my fingers to rub in the product and wait for the product to dry before I proceed with the next step. 


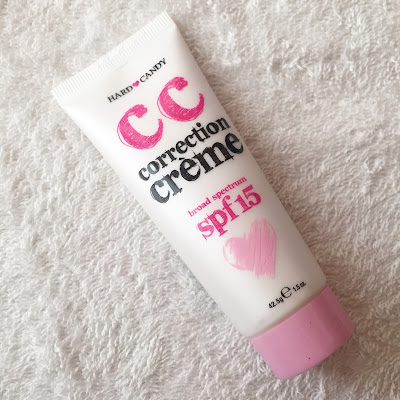
 It is completely up to you if you want to use a primer prior your everyday foundation or any bb creams, but for me I’ll go ahead and jump into my foundation. I only use primer for special occasions or events or whenever I need my makeup to stay longer. For everyday use or for normal days I just use my favourite foundation or a tintend moisturizer or a BB cream. But in this tutorial, I’m going to use my new fave the HARD CANDY CC CRÈME in the shade light. I’m using my flat-top kabuki brush to blend out the product. 


Because the CC crème doesn’t really cover my spots, I am now ready to do some spot concealing using my BEN-NYE SKI1 CONCEALER WHEEL. As you can see on the last photo, I avoid applying the cc crème under my eyes that is because I don’t like too much product in there. I do have dark under eye circles so a peach corrector is a beauty bag staple for me. Here I’m still using the ben nye sk-11 concealer wheel and I’m using the light peach color in the palette. Be careful not to apply too much because too much product under our eye will eventually crease or set into our fine lines after a few hours.  I’m using my fingers to blend the product well.


Right after the concealing and correcting it is now time to do some highlight. Here I use my MAC PRO-LONGWEAR CONCEALER in NC20 as a highlight and I’m applying it to my T-zone and under my eye area and using my pinky again to blend out the product. Make sure you blend your highlight really really well.


After all the creams and liquids time to set them with a powder. I’m just using MAYBELINE WHITE SUPERFRESH UV CAKE POWDER in the shade Honey with a big fluffy brush.


Because mama’s skin is now too flat applying bronzer is a must! I don’t normally contour on a daily basis but I want some warmth to my skin so I do bronzing. Here I’m using my NYC SMOOTH SKIN SUNNY BRONZER with An angled blush brush that I got from beauty cosmetics. Place the bronzer where you normally contour.


Here I’m using my CITY COLOR BE MATTE BLUSH in the shade Dragonfruit and my MAC MINERALIZE SKINFINISH in Soft and Gentle. Applying the blush on my cheeks blending it upwards towards my temples to give that blushing effect and at the same time it contours your cheeks a little. Then I apply my light reflecting powder to the highest points of my face (top of the cheekbones, cupids bow, and tip of the nose) 


Next, I do my brows and apply a thin coat of mascara. I will do a separate blog on how I do my brows to give you a much detailed tutorial about it. Here, I’m using my REVLON BROW FANTASY for my brows and my MAYBELLINE HYPER CURL VOLUME EXPRESS WATERPROOF MASCARA for my tiny lashes.


Last but definitely not the least, I will now apply my lipstain or a very sheer lipstick. The lipstick that I like to use during normal days is shygirl by mac or crème cup but in this tutorial I’m using my LOOK BEAUTY FAT LIPS in the shade Snog. It’s a lipstain and a balm in one I got this from Makeup hub.

Then I try to blot it out to remove excess moisture with a tissue paper and we are done beauties!

Here's the final look. :) 


I hope you find this tutorial helpful! Thank you for reading and I will talk to you again on my next post. What is your daily makeup routine? Share it at the comment box below.


Much love,
Anne 

Tuesday, August 04, 2015

RECENT MAKEUP HAUL!


Hi there beauties! It’s been a while since I’ve done a haul, actually I’m in a hiatus, banning myself for some shopping, but I couldn’t resist makeup. I think that shopping for makeup is therapeutic (the famous and well used reason of every beauty junkie ha-ha!).  As usual, your mama went crazy and ended up buying a lot well mainly for my “Professional Kit” and some for my own beauty bag. 

My clients are my real treasure. Especially if I do get a referral from them or repeat services because I feel and I know at some point I have done a great job for them. Why would they even refer me or hire me again if I did not? Right?  So I never really but knock offs (FAKE) for my kit, because my clients deserve premium quality makeup brands, I know because if ever I’m a client I would want that too. 

I did a quick shopping last thursday at Makeup Pro – Makati and purchased some stuff online at Beautyholic Manila. I have 4 separate orders so expect 2 haul post upcoming.

In this haul , everything I picked up are all face products because I wanted to try something new and restock some old favourites for my kit. Here are the products that I got from the Makeup Pro store and Beautyholic Manila.

    RCMA series favourites’ palette in KO


   Laura Mercier Foundation Primer (original) 


    Hourglass ambient blush in Diffused Heat 


    MAC Pro-longwear concealer in NC20 and MAC studio fix powder foundation in NC20 and NC30


I know that I’m too late about the Hourglass craze. I know, but it’s better late than never. Lol! So I made a pre-order for the other shade of Hourglass ambient blushes and the lighting powder just because I fell in love with the Diffused Heat. I think that they are perfect for weddings and other special occasions. I got the Pro-longwear for my personal beauty bag because it is my absolute favourite for my under eye. I got the 2 MAC studio fix powder foundation in NC20 and NC30 from Beautyholic Manila. I picked up the NC30 for back up because it is the most used shade in my kit. 

Plus I got some gifts from my Makeup Hub family! YEY! I got the very famous City Color Contour Effects and Look Beauty Intense color lip balm & stain Fat Lips in shade snog. Thank you Ms. Sarah! If you want to get your own check out their website at www.makeuphub.com.ph 


If you guys want to see in-depth reviews of any of these products, let me know at the comment section down below. Thank you again for reading my blog and see you again on my next post! Have you made any new beauty purchases recently?


Much Love,
Anne