makeup by anne bismonte

makeup by anne bismonte
Showing posts with label Lipsticks. Show all posts

Thursday, February 11, 2016

REVIEW: Colourpop Ultra Matte Liquid Lipsticks


Hey everyone! It feels good to be back writing again for you guys. Last quarter of the year 2015 was a though time for my family when my dear grandma joined our creator up in heaven.  I was really lost and busy with all the errands and clients that I wasn’t able to write anything for my blog. I actually plan to write “Christmas gift ideas, what I got for Christmas, etc.” but I didn’t manage to do it. It took me quite a while to just sit, sip a cup of coffee and do in depth product review like what I’m doing today.

Moving on, today I have a review for you which is highly requested and I think it’s one of the most popular products in the market, it is the COLOURPOP ULTRA MATTE LIQUID LIPSTICKS. Colourpop is really UNSTOPABBLE. Like REALLY. They’re making a huge bang on social media with all their gorgeous products and one of the most popular is their liquid lipsticks. Lately, it seems that every brand is coming up with their own version of liquid lipsticks and generally I am a huge fan of it because it’s long wearing and its matte.  Everyone loves matte. Who doesn’t? 

I only have 7 shades from the range to try out I believe there's more than 30 shades available and the product retails for about Php400-500 a piece (which is originally $6 a piece) depends on the re-seller here in the Philippines. I got mine from @everydaydaze at instagram if you want to check out. The tube has 0.11 oz of product which is a decent amount in my opinion. Packaging is pretty much simple and very straight forward to its use; it came in a plastic tube with a silver cap and a doe foot applicator.  The doe foot applicator is a bit stiff and gives me a sloppy application so sometimes I use a different lip brush. 


Like all liquid lipsticks available in the market, they are in liquid form that dries down into ultra mate finish. Formula is thin that makes it light weight on the lips but don’t be fooled -- this product has an intense pigmentation.  At first swipe it has watery consistency that glides on smoothly and after a couple of seconds it dries down into an ultra matte finish. Ultra matte in the sense that there is no moisture in this product, it feels powdery when it dries but it is weightless on the lips. It has a weird feeling at first but you’ll get used to it. 


I love the fact that they’re so pigmented and very long wearing that can last through eating and drinking. You can even kiss someone without leaving a mark (how about that? LOL!) And another thing, it’s better to get a one smooth and even application with one swipe rather than layering the product because these babies’ dries so fast that may look crumbly when you start to layer them. 


These liquid lipsticks hold up to 8 hours or so on my lips. It stained my lips specially if you’re using dark deep or bright shades from the range. It’s pretty hard to remove; you’ll need coconut oil and lip balm to remove it. I did a lip swatch for this blog and boy after rubbing my lips so hard (because they’re freaking hard to remove) I got sore stained lips after. 


Something to note about these liquid lipsticks; because it is completely matte and absolutely no moisture or hydrating ingredients in it you’ll need to prep your lip before applying them. I like to use first my carmex ointment which is a thick lip moisturizer (wait till it dries to your lips) before I apply my liquid lipstick. Also, lip pencil is a must! These gorgeous lippies flake so bad (specially in the inner part of the lip) so I suggest use a lip-liner to keep them in place. 

Let me show swatches of the shades I got. (some lip swatches are a little sloppy, I apologize. :D) 


MARS


BAD HABIT 


SOLOW


BUMBLE


BEEPER


TEENY TINY


TRAP

Are they worth it? Overall, I like them and I do think they’re worth it. They are smudge proof (has little flaking and fading in the middle part but can probably be fixed with a lip liner and a minimal touch up) long wearing (lasted up to 8 hours) and for its price (range for about 400-500 a piece) it is already a good buy. Not to mention it has pretty much the same result from high end brand (Anastasia and Lime crime) so $6 compare to $20? I'll probably go with the $6. Hehehe!  My favourite shades are Solow and beeper, they’re the most easy to apply and wearable in my collection.  Have you tried any Colourpop products? 


With Love,
Anne


shop here at zalora.com.ph

Gift Voucher Code use ZBAPZDSW at check out and get a 15% off  on your total purchase!


DISCLAIMER: This is not a sponsored post. This post contains my genuine thoughts and recommendations. MakeupbyAnneBismonte uses affiliate links and and voucher codes, which allow me to receive a small commission with your purchase. Your purchase helps to support makeupbyannebismonte blog! 


Tuesday, June 03, 2014

PRODUCT REVIEW: Makeup Academy Velvet Luxe Lip Lacquers


Afternoon beauties!! 

I had these MUA Velvet Luxe Lip Lacquers few months back and finally I have decided to makea review about them. I am pretty much sure there is a ton of reviews about these MUA lip lacquers. So to top it all off, the review about this product is from my very own experience and my own honest opinion.


I have been eyeing this product ever since and a lot of people have been raving about them that it is supposed to be like Lime Crime Velvetines. So I finally caved in and gave them a try. I got my MUA lip lacquers from Sundance Bazaar from the booth of Props and Tools Cosmetics but the products are from The Makeup Hub. This cost Php 380.00 each. YES! 380.00 pesos only! The Velvetines from lime crime cost Php 950.00 each I guess. Definitely MUA Luxe Velvet Lip Lacquers are more affordable than the Lime Crime.


The packaging is so cute and very elegant looking. It has a frosted tube packaging with a doe foot applicator. The doe footed applicator is easy to use with this kind of liquid lipstick although it's hard to control sometimes. If you want a precise and neat application you may want to try to use a fine lipstick brush instead.

Let me show you some swatches.

GLOSSY WHEN APPLIED FIRST
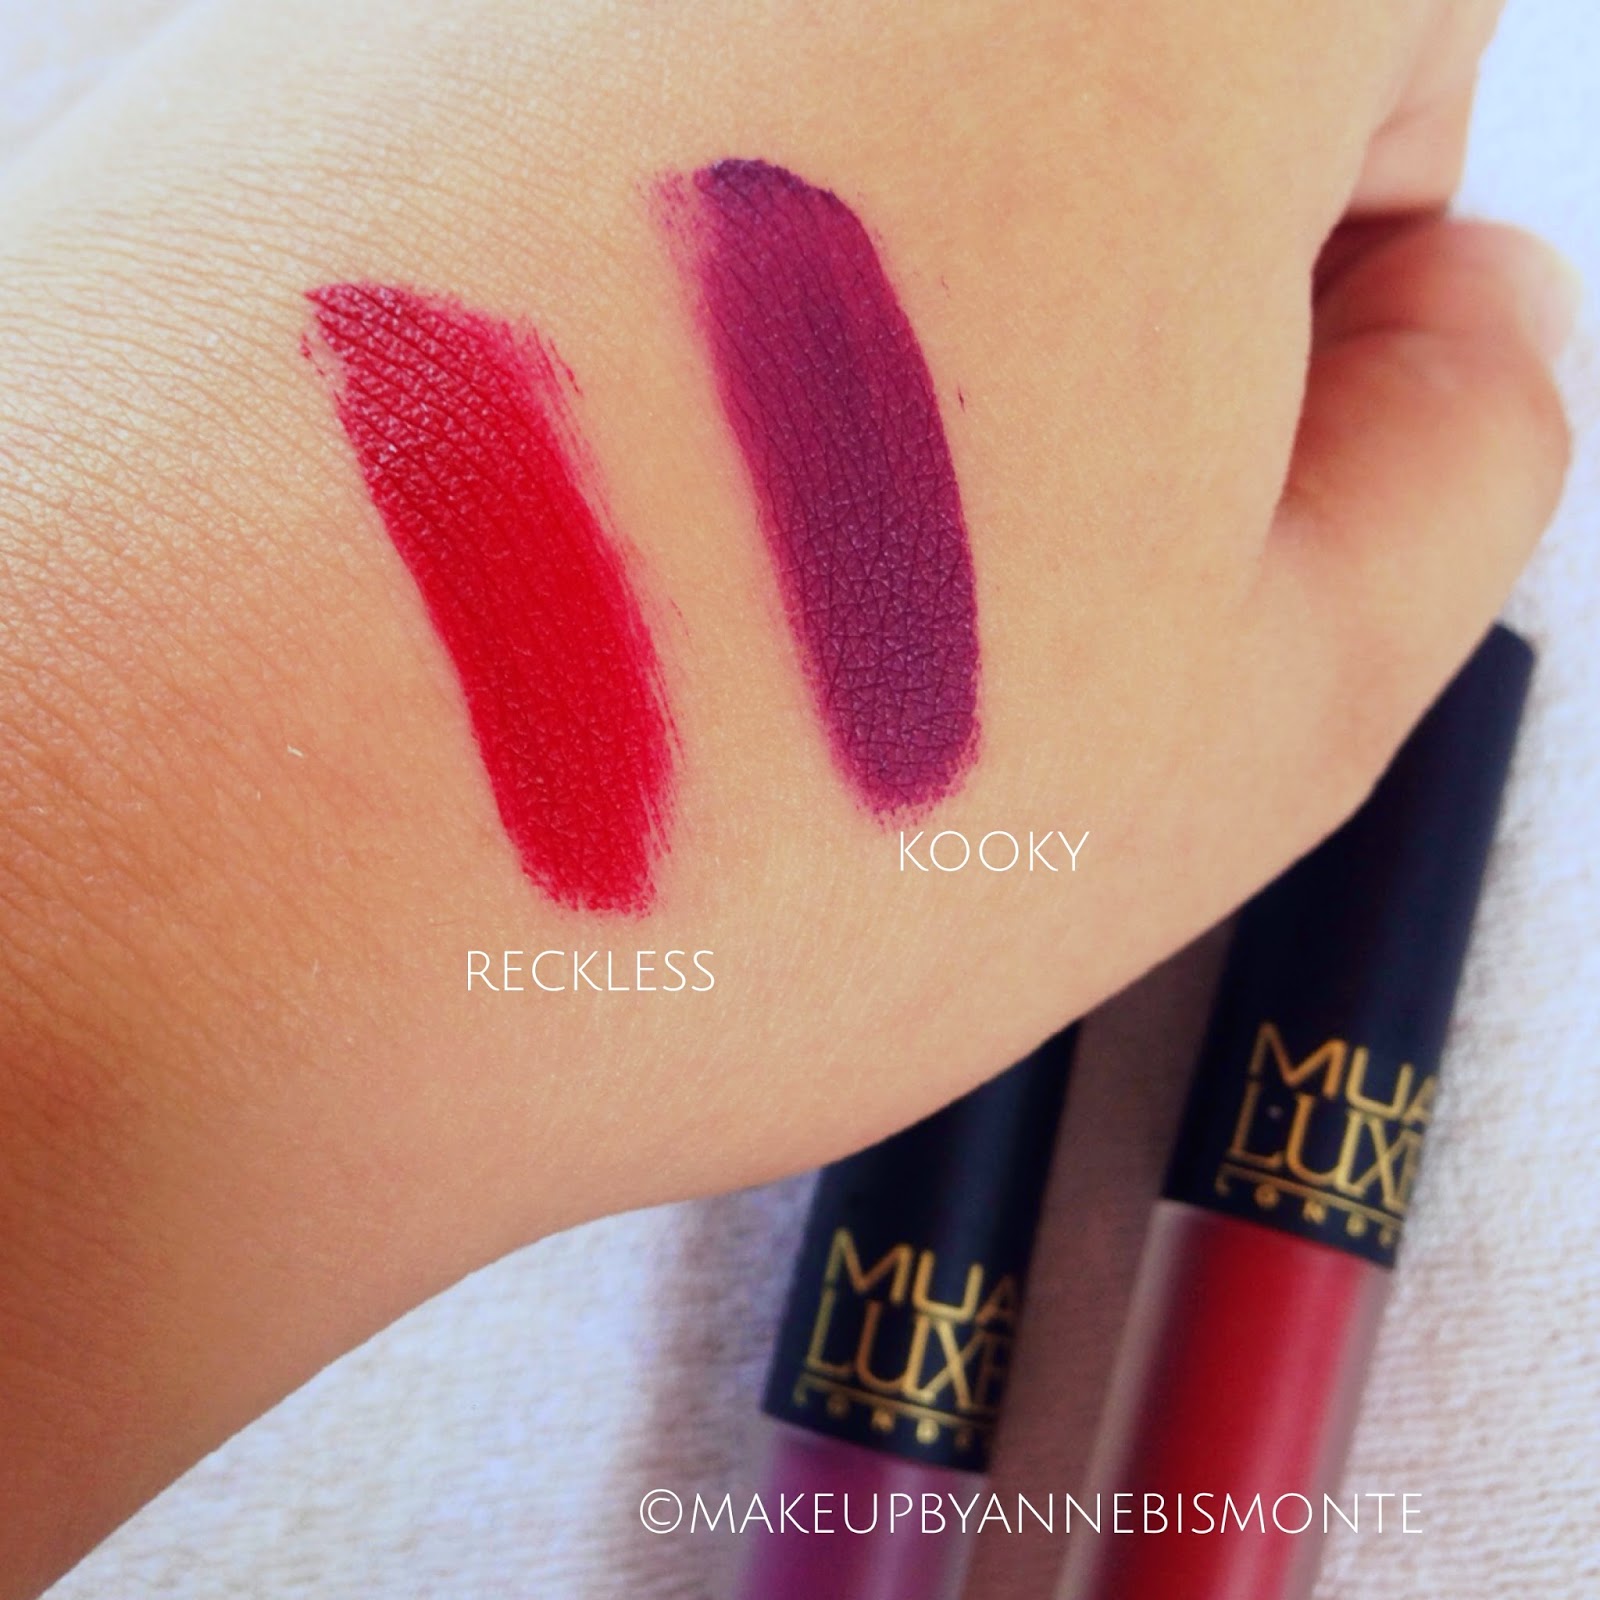
I've fallen head over heels in these velvet lip lacquers! As you can see they're very pigmented which I appreciate at most times in a lip product. It starts off wet looking or glossy once you apply it and dries into a matte velvety finish, just give them a minute to dry out and do not try to smack your lips or they will end up patchy.

DRIES INTO A MATTE VELVETY FINISH
I've fallen head over heels in these velvet lip lacquers! As you can see they're very pigmented which I appreciate at most times in a lip product. It starts off wet looking or glossy once you apply it and dries into a matte velvety finish, just give them a minute to dry out and do not try to smack your lips or they will end up patchy.

The color pay off is remarkably amazing but the long lasting claim is not. I am enjoying these two and I actually regret not getting the other colors. For the price it's already a steal. You'd get a very good amount of product in a tube but It wouldn't last long for me because I keep on retouching as the product fades quite often.


Will I recommend it? Definitely YES. It is worth trying for its price.

I hope you enjoyed reading and find this review helpful. Have you tried any lip lacquers?

MUA Lip Lacquer in KOOKY


Tuesday, October 22, 2013

HOW TO DEPOT LIPSTICKS INTO A PALETTE


Hello there! Sorry for being a MIA these past few weeks as I am totally busy with my school and work and being a mom as well.  So for now, I’m going to share how I depot my lipstick into a small lipstick container.

When I start to collect makeup I am so into lipsticks. I love lipsticks! I have different bunch of colors to different kinds of finishes. But I actually realized that it is kind of annoying not to be able to see the colors or shades of your lipstick – you have to turn them over to read the shade until you find something you’re after – after opening and closing loads of lids of course. But for personal reason putting your lipsticks into a palette is not really advisable as it became not handy or travel friendly anymore. I’m sure that you don’t want to bring your full set of lipsticks with you every day.  But if you are a professional makeup artist and wants to maximize your makeup traincase and wants to put everything organized, you may want to have a lipstick palette.

On my first day to school we have talk about “professional make-up kit”. On how to build and what are the things that a pro needs in her kit. Maybe I will share with you my kit some other time just for you to have an idea what a professional kit has.


Here are the steps:
  1.) Choose your container and your lipstick colors. Be mindful that if you have small containers and you’re going to separate the lipsticks make sure you will group them by colors. All shades of pinks ex.  Light pink to vibrant fuchsia.  Then all shades of red ex.  Deep red to orange-y red. From plums to mauve then your own set of nude colors.  So it will have a gradient look of different shades of a particular color.

 2.) Now, cut the lipstick and put it in a large spoon and melt it in a candle.

3.) Pour the lipstick inside the empty container. (Mine is not tally melted because I will put it              inside the oven)

4.) Clean the edges of the container.


Now, you can stop there. But as you can see, Given that this is my first time to depot my lipsticks I am not satisfied with the look after melting it. So I have decided to put in inside the oven. Now, you can start by just putting it inside the oven, I think it is much easier just be careful with the containers because it is made out of plastic.

    5.) Put the containers inside the oven for 2-3 mins and wait till the lipstick becomes liquid in form.

    6.) Now, it is in liquid form put the lipstick inside the freezer for 10 mins and wait until it becomes solid.

    7.) You can peel the stickers of the lipstick tube and put them in the corresponding lipstick so you would   know what shade it is.

   And there you go! You now have your own lipstick palette.


   Lipsticks I used for depoting:
   For pinks: Mac Candy yum yum -  Mac Chatterbox - Rimmel London Nostalgia
   For reds: Mac Red - Mac Ruby woo - Rimmel London Deep Red
  
   Hope you enjoyed reading! God bless!